How to Install RetroFoam in Homes with Cedar Shake Siding
RetroFoam insulation | existing wall insulation | Installation


When insulating your home with RetroFoam, the installation process can vary depending on your exterior – especially with cedar shake siding.
Cedar shake provides a classic look to your home, but its unique structure requires special attention during foam installation. If you’re considering installing RetroFoam in a home with cedar shake siding, here’s a step-by-step look at what you can expect from start to finish.
Preparing Your Home for Insulation with Cedar Shake Siding
Before getting started, it’s important to communicate with your insulation contractor about protecting your landscaping.
The installation process can be messy, and ensuring your shrubs, flower beds, and outdoor furniture are safe from debris will help keep your yard looking great during and after the installation.
Protecting Landscaping and Outdoor Features
The installation crew will use tarps or protective coverings to safeguard landscaping and other elements near your home.
This step helps ensure that any foam particles, wood shavings, or other materials from the cedar shake siding removal don’t end up damaging your yard.
Removing Cedar Shake Siding for Injection Foam Insulation Installation
For homes with cedar shake siding, the installation team has two primary options to access the wall cavities for the injection foam.
Option One: Lifting and Removing Cedar Shake
In some cases, the team may be able to carefully pry up each cedar shake to gain access without removing or damaging the shakes.
However, this approach depends heavily on your home’s siding layout and the placement of nails and overlaps. Sometimes, nails or overlapping shakes make it difficult to lift them without causing damage, making this option less reliable.
Option Two: Scoring and Cutting Cedar Shakes for Clean Removal
The most common and recommended approach is to score the top of each shake where it meets the shake above it.
The team can lift the shake cleanly by cutting through this section without risking cracks or splinters. This method helps ensure a seamless look when the shakes are reinstalled.
Tip: Each cedar shake is carefully numbered and cataloged before removal. This system allows the crew to reattach each shake in its original position, ensuring the final look mirrors the initial layout perfectly.
Installing RetroFoam Insulation Behind Cedar Shake Siding
Once the cedar shakes are removed, the sheathing (the wall structure underneath the siding) is exposed, allowing the crew to drill into it and inject the foam insulation.
Drilling into Sheathing for Injection Foam Access
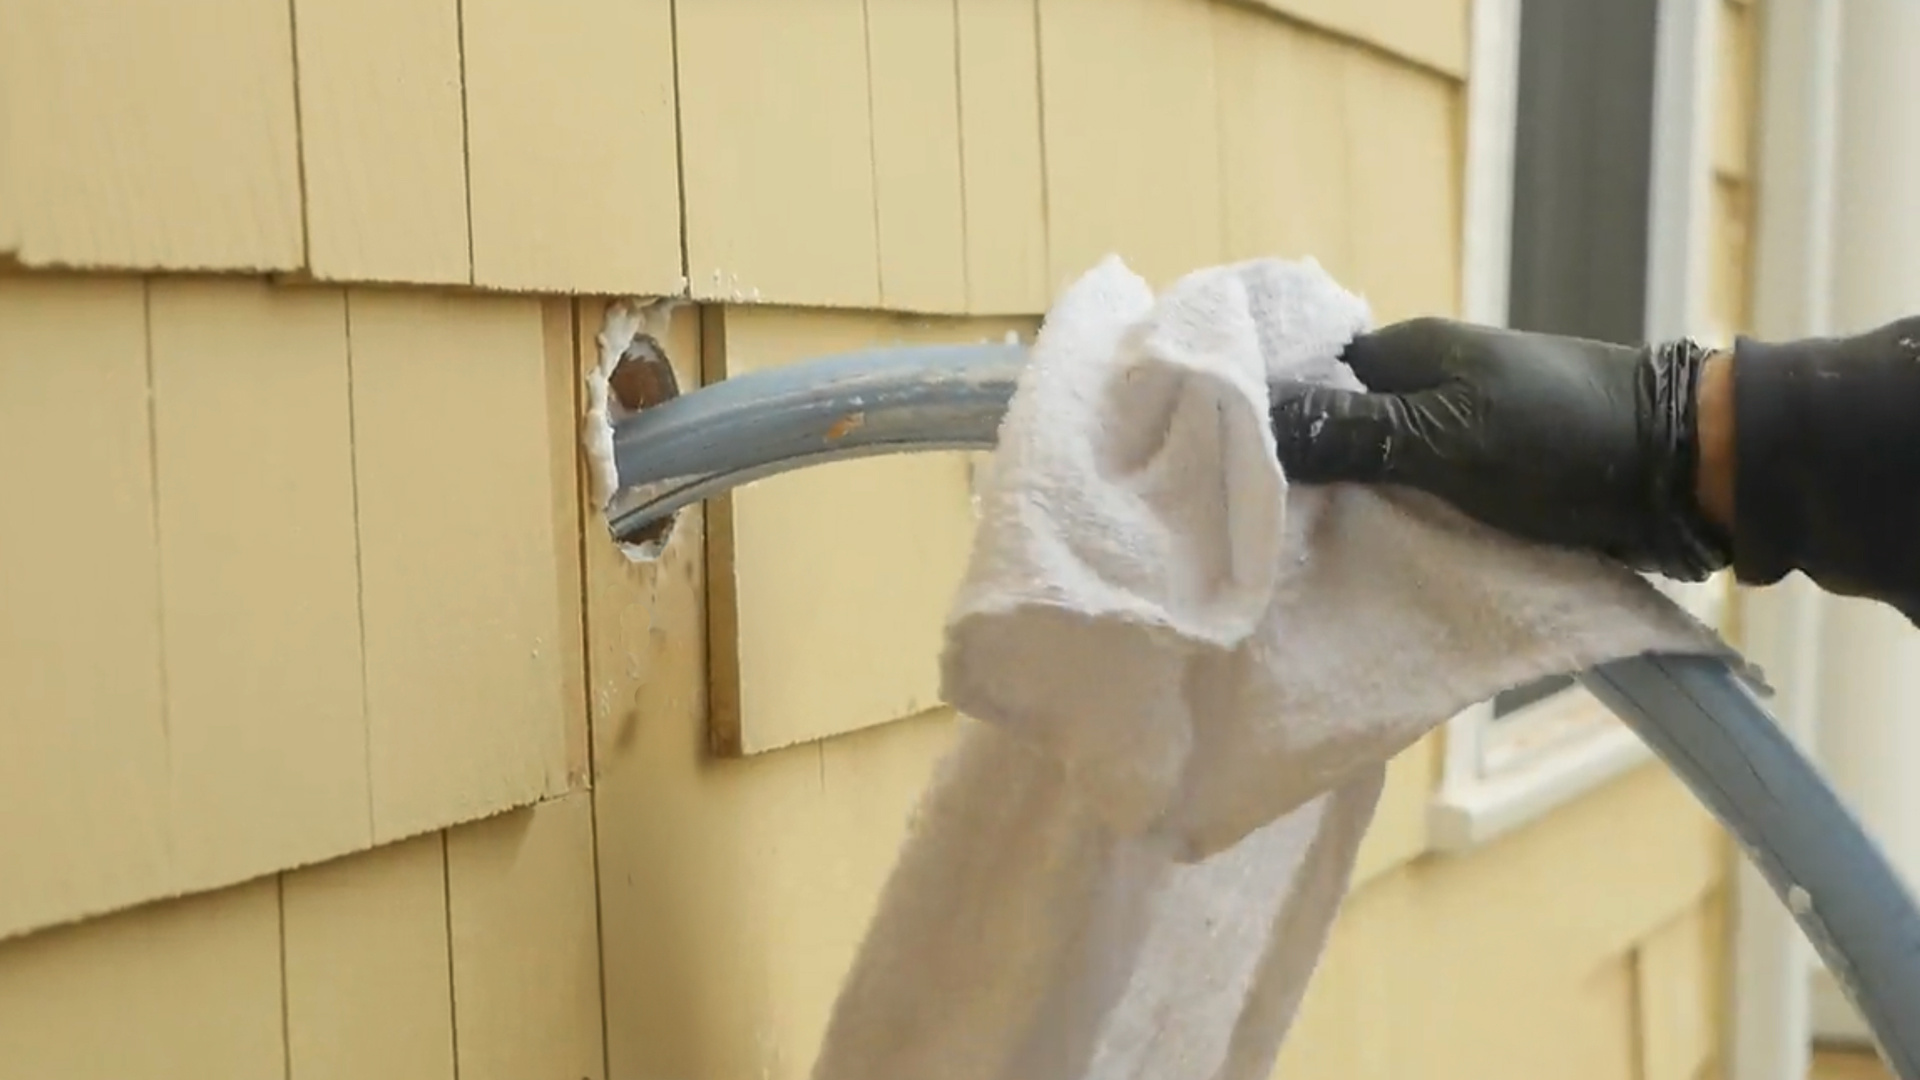
With the sheathing visible, the crew will drill holes to create access points for the injection foam.
Each hole allows the installer to reach every stud cavity inside the walls. This process includes checking for hidden or small obstructions and ensuring the hose reaches both the top and bottom of each cavity so no section is left uninsulated.
Injecting RetroFoam into Wall Cavities
After creating access points, the team will inject RetroFoam into each cavity.
The foam flows through each section to fill the entire cavity, reducing air leaks by creating an air seal and improving the overall insulation. This process will keep your home comfortable while minimizing energy costs.
Reinstalling Cedar Shakes After Foam Installation
Once the installation process is complete, it’s time to put the cedar shakes back in place.
Reattaching the Cedar Shakes
Each shake is realigned with its original position on the siding and secured with nails to ensure stability.
While the nails are initially visible, there are options to cover nail heads for a cleaner finish, depending on your preferences.
Finishing Touches: The installation team will ensure each shake aligns like a puzzle piece, keeping the original look intact. This step is crucial to maintaining the aesthetic of cedar shake siding, especially in older homes where each shake has naturally weathered over time.
Thorough Cleanup and Final Walkthrough
Foam insulation installation can generate wood shavings and foam particles, especially with cedar shake removal.
The crew will complete a thorough cleanup, including:
- Removing foam and debris from the yard and surrounding areas.
- Clearing wood shavings from around the home.
- Checking landscaping for any remaining particles.
Once the cleanup is complete, the team will invite you for a final walkthrough. You’ll be able to inspect your home’s exterior and verify that the installation process left it looking as it did before the work started. This inspection is essential, as your familiarity with your home’s exterior allows you to catch any details the crew might overlook.
Frequently Asked Questions about Cedar Shake Siding and RetroFoam
How can I ensure the cedar shakes stay secure after installation?
Each cedar shake is nailed back into place, which is the most effective way to secure them.
Options to cover the nail heads can give a cleaner finish and protect the nails from the elements.
Will foam insulation damage my cedar shake siding?
When installed by a professional and experienced crew, the process is designed to minimize damage.
The team carefully removes and reattaches each shake to preserve your home’s look and structural integrity.
How long does the insulation installation take?
While the time varies based on the size of the home, cedar shake installation can take longer due to the careful removal and reattachment process.
Why Choose RetroFoam for Homes with Cedar Shake Siding?
Adding RetroFoam insulation to your cedar shake-sided home not only improves your home’s energy efficiency but also helps reduce noise and enhances overall comfort.
RetroFoam fills all of the gaps within your walls, keeping your home warmer in the winter and cooler in the summer, leading to lower energy bills and increased comfort.
Whether you’re ready to take the plunge with a RetroFoam dealer in your area or simply curious about the process, insulating a home with cedar shake siding can be smooth and straightforward with the right knowledge and professional crew. This installation approach protects the beauty of your cedar shake and enhances your home’s energy efficiency, making it a worthwhile investment for any homeowner.
For more information about the benefits of foam insulation for your project, check out our Learning Center, where you’ll find guides, articles, and videos to help you make informed decisions about your home’s insulation needs.
Related Articles
What are the Best Exterior Wall Insulation Options?
Insulating Exterior Walls from Inside with RetroFoam
Adding Insulation to Exterior Walls: Installing RetroFoam with Different Siding Types
About Amanda Emery
Amanda previously has worked as a breaking news and crime reporter, TV news producer, and editor. As a journalist, she has won several awards from The Society of Professional Journalists - Detroit Chapter and the Michigan Press Association. Amanda uses her experience as a journalist to write content that will help educate homeowners on foam insulation benefits. When Amanda isn’t writing, she’s spending time with her husband Chris, daughter Lilith-Maeve, and rescued huskies Danger and Wendigo. She also loves knitting, making art, and cooking.


