How RetroFoam is Installed in Exterior Brick Walls
injection foam insulation | RetroFoam insulation | existing wall insulation | Installation


How is RetroFoam Installed in Exterior Brick Walls? (Quick Answer)
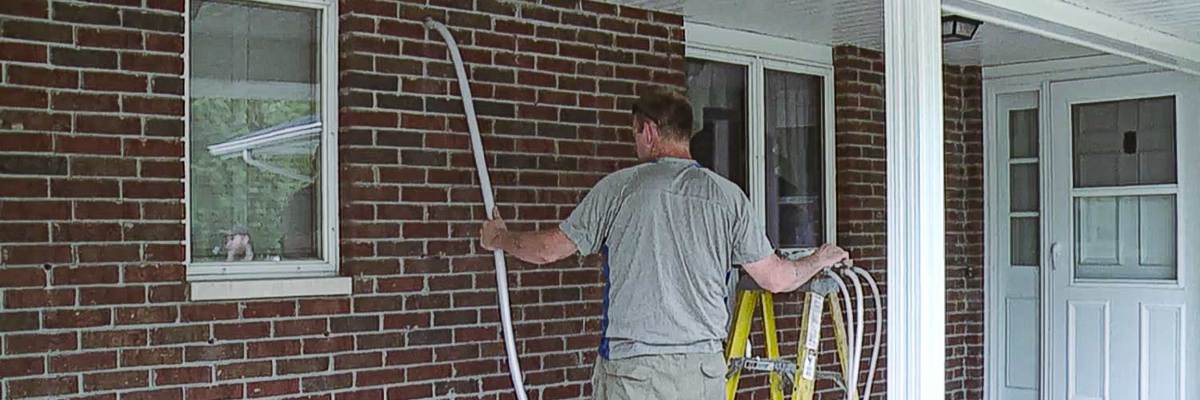
RetroFoam injection foam insulation is installed into existing walls with brick exterior by drilling three 5/8-inch holes at the top, middle, and bottom of each wall cavity in the mortar, so the injection foam completely fills the space.

Once the foam has been injected, the holes are filled with mortar, and everything is cleaned up.
Let’s take a deep dive into how RetroFoam is installed into exterior brick walls.
You might be thinking that insulating exterior brick walls require tearing all of the bricks out, but that’s not the case – at least not with RetroFoam insulation.
Our RetroFoam dealers have experience working with injectable insulation for existing homes, so they know how to work with your brick. There won’t be any need to tear brick out or install the injection foam insulation from the inside.
We are on a mission to educate homeowners on all things RetroFoam home insulation. In this article, we’ll explain how to insulate brick walls from the outside with RetroFoam.
Insulating Exterior Brick Walls with RetroFoam from the Outside
Working with brick exterior is a little more complicated than working with aluminum or vinyl, but not quite as tricky as working with wood.
Before we jump into adding insulation to existing walls, let’s first talk about what’s already in there.
If there is fiberglass in the walls, there’s no issue because the injection foam insulation will compress it as it fills the cavity. If there is cellulose in the walls, it is more complicated.
In the case of cellulose insulation, it needs to be either removed, or the wythe cavity will be insulated instead, but more on that in a minute. Now, let’s jump into the exterior brick wall installation process.
The installer will drill 5/8-inch holes at the top, middle, and bottom of each cavity in the mortar. This is done so the installer can make sure the cavity is completely filled when the foam is injected.
Once adding injection foam insulation in the existing walls is finished, the holes are filled with mortar, so there aren’t any air gaps.
Now it’s time to talk about where the RetroFoam is installed in the wall.
Should the Wythe Cavity or Between the Studs Be Insulated?
You know how the RetroFoam is installed, now let’s briefly discuss where it goes.
The wythe cavity is a small air space between the brick exterior and the stud cavity. On one side, there is brick, and on the other, there is the sheathing that separates it from the stud cavity.
You’re probably thinking insulating the wythe cavity would make the most sense, but that’s not always the case.
The preferred method when deciding whether to insulate the wythe cavity or the stud cavity is the stud cavity, and here’s why.
You want to preserve your brick exterior. As the injection foam enters the wythe cavity, there is the possibility that the pressure could push out the bricks. Because of this possibility, installers take their time, and the process takes much longer, but even with this precaution, the bricks could push out.
Because of this, the preferred method is to drill into the mortar, through the wythe cavity, and right into the stud cavity to inject the foam.
There are instances when the wythe cavity is the better option.
For example, if there is cellulose in the wall cavity, then the wythe would be insulated instead.
Another scenario is if the walls have paneling. The injection foam can cause the paneling to push out, which can be challenging to fix depending on how the paneling is attached.
Injecting Foam Insulation into Existing Walls in Your Home
A better understanding of how your RetroFoam dealer will work with your brick exterior doesn’t mean you still don’t have questions or concerns.
We have worked with homeowners who were worried about the way the holes will look in the mortar. Honestly, it could be noticeable but most times after it weathers you can't even tell from the road - you'd need to get up close and personal to see where the holes were drilled.
You also have the option to have the RetroFoam installed from the inside of your home.
If you have any more questions, we have answers. Check out our RetroFoam Install page to learn more about our other install processes. If you want to learn more about RetroFoam, head on over to our Learning Center.
Related Articles
Who is Not a Good Fit for RetroFoam Home Insulation?
How to Tell if There is Insulation in the Wall
How Do RetroFoam Installers Know the Cavity is Full When Insulating Existing Walls?
About Amanda Emery
Amanda previously has worked as a breaking news and crime reporter, TV news producer, and editor. As a journalist, she has won several awards from The Society of Professional Journalists - Detroit Chapter and the Michigan Press Association. Amanda uses her experience as a journalist to write content that will help educate homeowners on foam insulation benefits. When Amanda isn’t writing, she’s spending time with her husband Chris, daughter Lilith-Maeve, and rescued huskies Danger and Wendigo. She also loves knitting, making art, and cooking.


